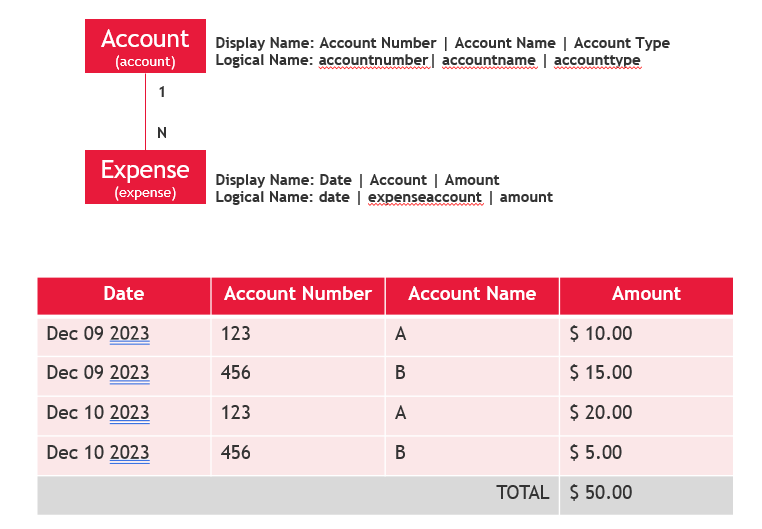
Scenario:
1. A user shall be able to run the report from the Account table.
2. A user shall have the option to filter the report based on Account Type (Let’s assumed that Account Type is an option set field.)
1. Build the Expense dataset.
To satisfy the first requirement of being able to run the report from Account, we want to enable prefiltering in the context of the Account entity. To do so, we add these attributes and their corresponding value into the query: enableprefiltering=”1″ and prefilterparametername=”CRM_FilteredAccount”.
(Note: Just adding the enablingprefiltering propery would do. Once added, the prefilterparametername will get automatically created.)
<fetch version="1.0" output-format="xml-platform" mapping="logical" distinct="false">

  <entity name="expense">

    <attribute name="date" />

    <attribute name="expenseaccount" />

    <attribute name="amount" />

    <attribute name="expenseid" />

    <link-entity name="account" from="accountid" to="expenseaccount" visible="false" link-type="inner" alias="account" enableprefiltering="1" prefilterparametername="CRM_FilteredAccount">

      <attribute name="accountnumber" />

      <attribute name="accountname" />

      <attribute name="accounttype" />

    </link-entity>

  </entity>

</fetch>
2. Build the Account Type dataset.
To get the option set values and names, we write a query to the stringmap table. The attributename we are looking for is accounttype.
<fetch>
<entity name="stringmap" >
<attribute name="attributevalue" />
<attribute name="value" />
<filter type="and" >
<condition attribute="objecttypecodename" operator="eq" value="account" />
<condition attribute="attributename" operator="eq" value="accounttype" />
</filter>
</entity>
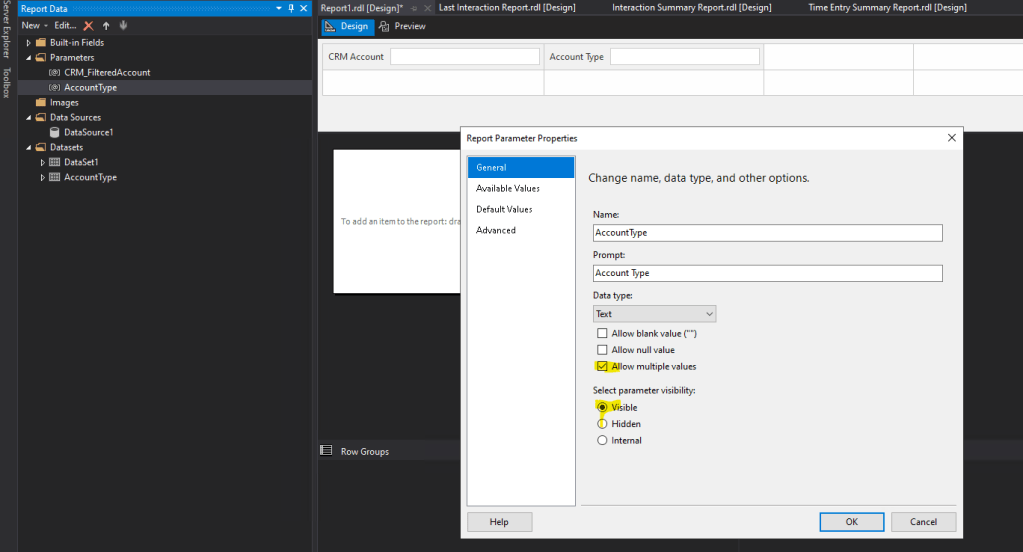
</fetch>3. Add the Account Type parameter.
Set the Available Values of this parameter as shown in this image:

On the General area, make the parameter visible and check off Allow multiple values.
4. Add the Account Type filter into the Expense dataset.
Add the lines in green into the query of the Expense dataset from step 1. Also note that the operator is “in” since one or more Account Types can be chosen as the report filter.
<fetch version="1.0" output-format="xml-platform" mapping="logical" distinct="false">

  <entity name="expense">

    <attribute name="date" />

    <attribute name="expenseaccount" />

    <attribute name="amount" />

    <attribute name="expenseid" />

    <link-entity name="account" from="accountid" to="expenseaccount" visible="false" link-type="inner" alias="account" enableprefiltering="1" prefilterparametername="CRM_FilteredAccount">

      <attribute name="accountnumber" />

      <attribute name="accountname" />

      <attribute name="accounttype" />

      <filter type="and">

        <condition attribute="accounttype" operator="in" value="@AccountType" />

      </filter>

    </link-entity>

  </entity>

</fetch>
5. Add tablix component into the canvas.
I’ll leave this part out (coz I’m lazy :)). The tricky thing here is how to group columns and get the totals based on how they were grouped together. Once through, build and download the report.
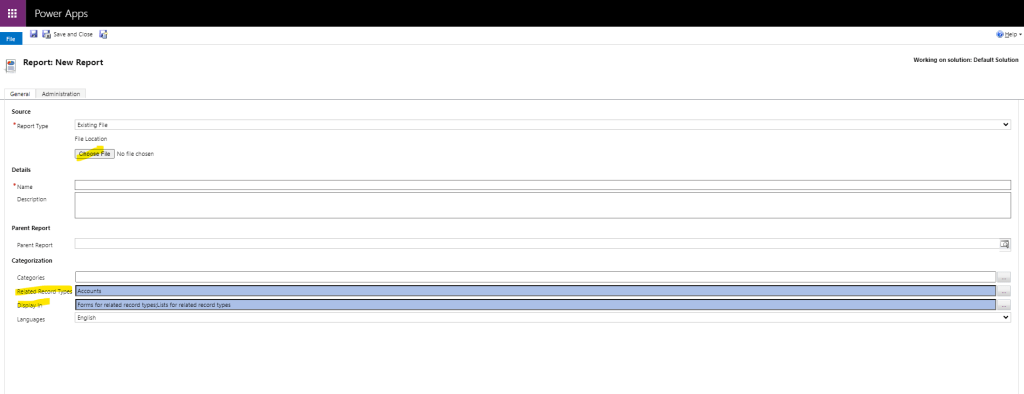
6. Add the report into a solution.
In the maker portal (make.powerapps.com), open your solution then add a new report. Upload the report. Since the report is to be generated from the Account screen, we shall set Related Record Types to Accounts and Display In to Forms for related record types and Lists for related record types.