
Goal: Build a custom page that a user can interact with upon clicking a button on the contact record.
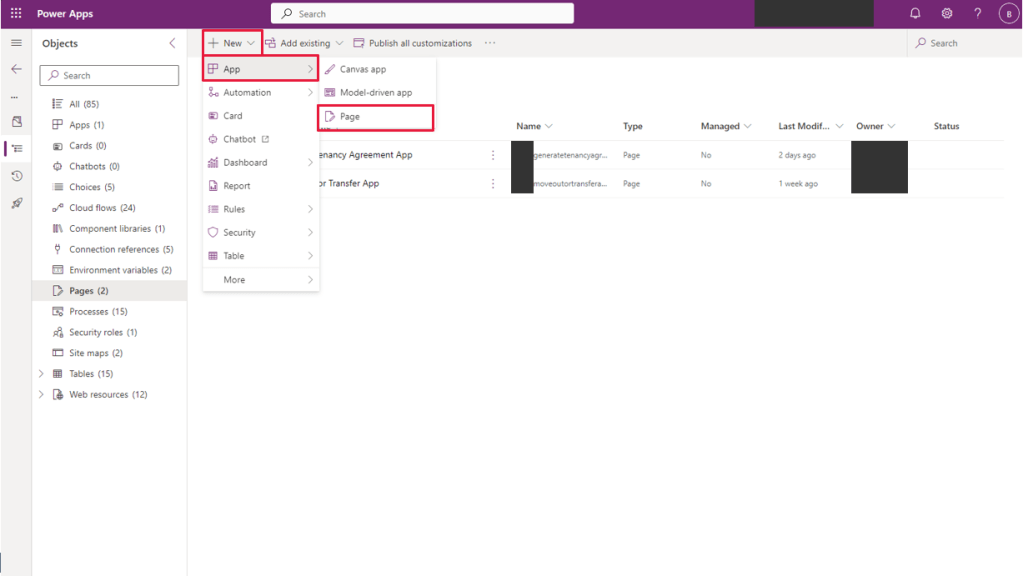
1. Create the custom page.
1.1 Go to your solution.
1.2 Click + New > App > Page
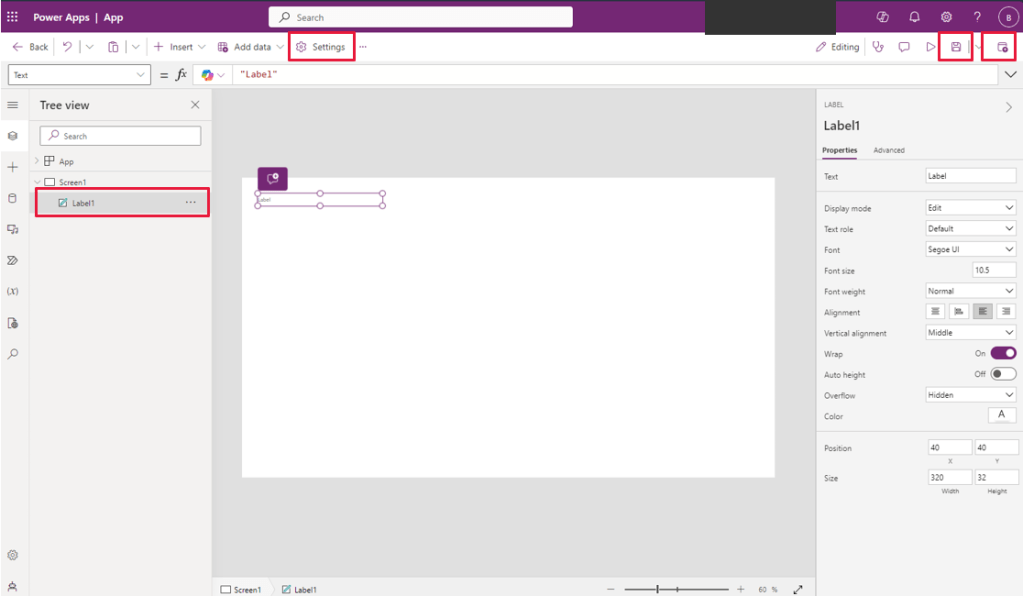
1.3 Click on Settings and specify a name and description for the the app.
1.4 Simply insert a single control for the moment because all we want at this point is to save this custom page and grab its name, which is to be refenced by the script in step 3. Jazzing up the custom page can take place later.
1.5 Click on Save and Publish.
1.6 Head back to your solution. On the navigation pane, select the Pages object. Make a note of the name of the custom page that has just been created.
2. Open the command designer.
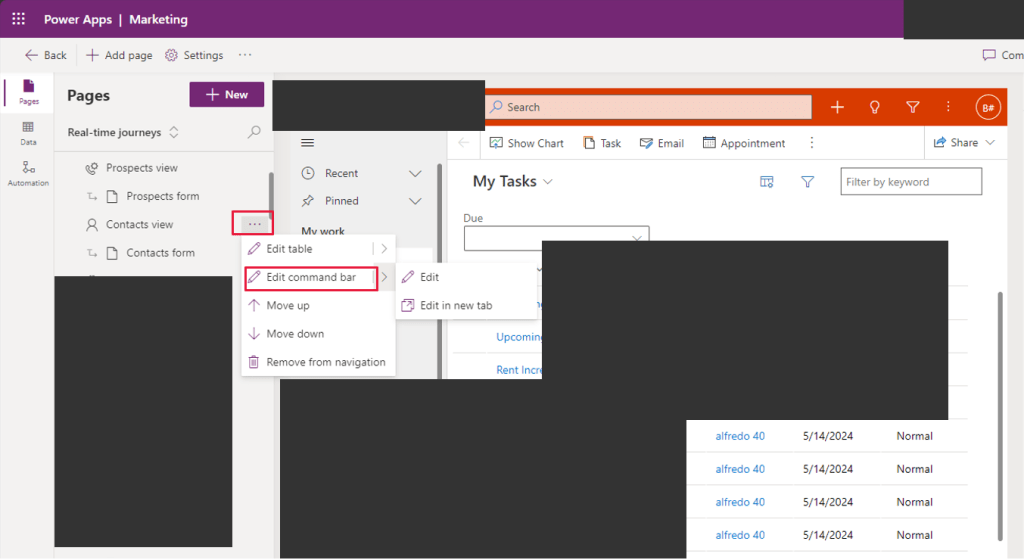
2.1 Open the model-driven app designer of the app where you plan to add the button into (in my case, Marketing app).
2.2 On the navigation, click on ellipsis next to the table where you are adding the button (in my case, Contacts).
2.3 Click on Edit command bar > Edit or Edit in new tab to launch the command bar designer.
2.4 Choose Main form and hit Edit.

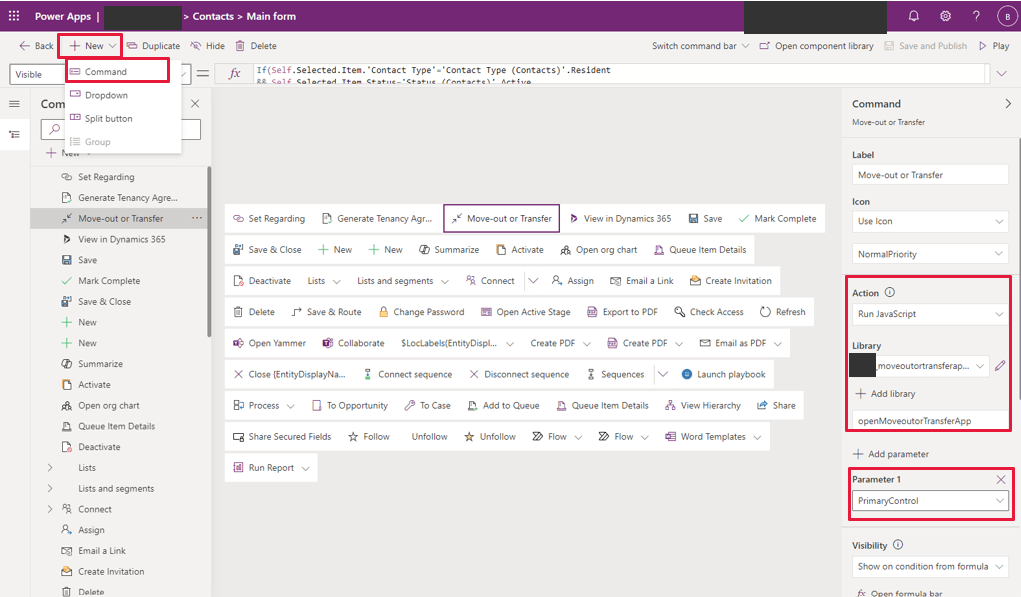
3. Add the command.
I named my button Move-out or Transfer. I added this by pulling down the options under + New found on the upper right hand corner and selecting Command. On the right-hand side under Action, select Run JavaScript, add the library, and enter the name of the function to be invoked. I have also specified PrimaryControl parameter to be able to access the data of the specific record where this button was triggered.
Here is the script:
function openMoveoutorTransferApp(primaryControl)
{
    var formContext = primaryControl;
    var recordGUID = formContext.data.entity.getId().replace(/[{}]/g, "");
    console.log("Record GUID: " + recordGUID);
    var pageInput = {
        pageType: "custom",
        name: "moveoutortransferapp", //--> This is the name of the custom page.
        entityName: "contact",
        recordId: recordGUID
    };
    var navigationOptions = {
        target: 2,
        position: 1,
        width: {value: 50, unit: "%"},
        //height:{value: 550, unit: "px"},
        title: "Move/Transfer"
    };
    Xrm.Navigation.navigateTo(pageInput, navigationOptions)
        .then(
            function success()
            {
                formContext.data.refresh();

                //I added this block because I needed the contact form to reload once the custom page is closed.
                var entityFormOptions = {};
                entityFormOptions["entityName"] = "contact";
                entityFormOptions["entityId"] = recordGUID;
                Xrm.Navigation.openForm(entityFormOptions).then(
                    function (success) {
                        console.log(success);
                    },
                    function (error) {
                        console.log(error);
                    });

            }
        ).catch(
            function error() {}
        );
}
4. Build the custom page.
I’m not going to detail how to build the app itself. Rather, I’d just be listing down the things that stuck out with me (i.e. things that caused me a few sleepless nights :)) and therefore things I ought to remember when it comes time to develop another one.
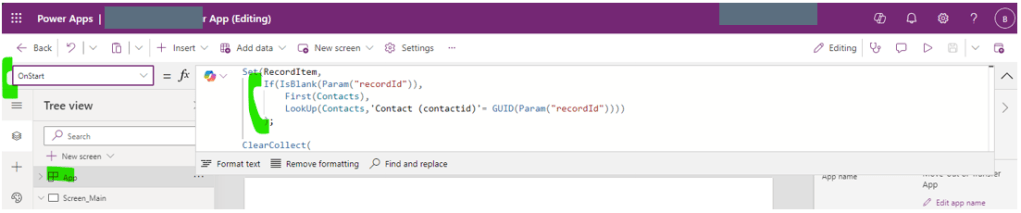
4.1 The guid of the record that is passed in when the custom page is invoked can be accessed using the Param function. The parameter of the Param function is the recordId, which is a property of the pageInput object (see above script) .Given this, I can get the entire contact record and store it into a variable. Here is what the expression will look like:
Set(RecordItem,
    If(IsBlank(Param("recordId")),
        First(Contacts),
        LookUp(Contacts,'Contact (contactid)'= GUID(Param("recordId"))))
    );
The above expression is added into the OnStart property of the app.
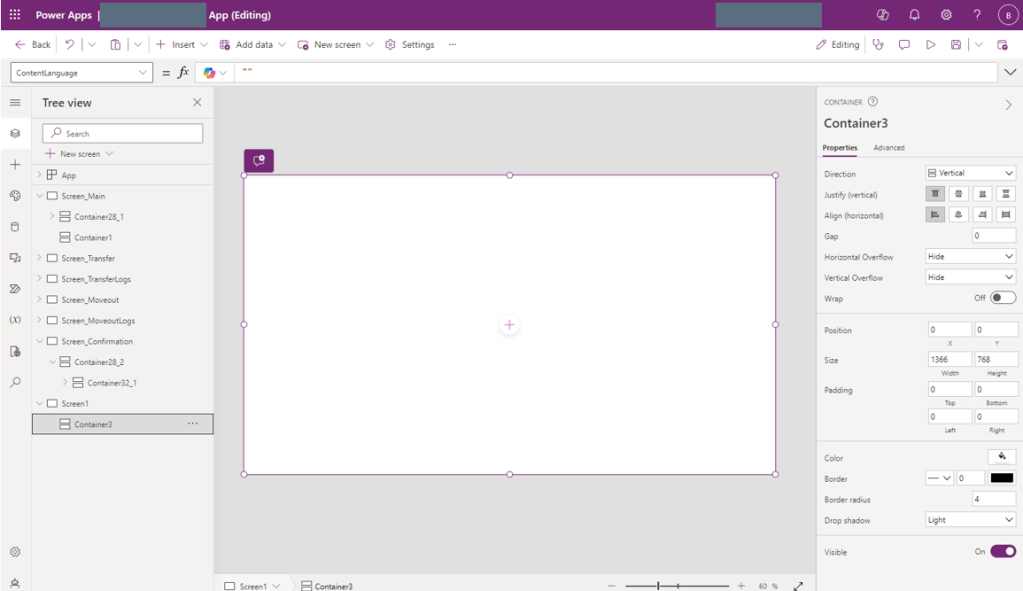
4.2 Before inserting any other control, add a parent vertical or horizontal container in a screen, with these properties configured as below:
X = 0
Y = 0
Width = Parent.Width
Height = Parent.Height
4.3 Set up one form for creating a new record or updating an existing record, not one for each operation. To control what mode the form will be in, use the NewForm(name of the form control) or EditForm (name of the form control) function.
Here I have set up a form where the DefaultMode is Edit.
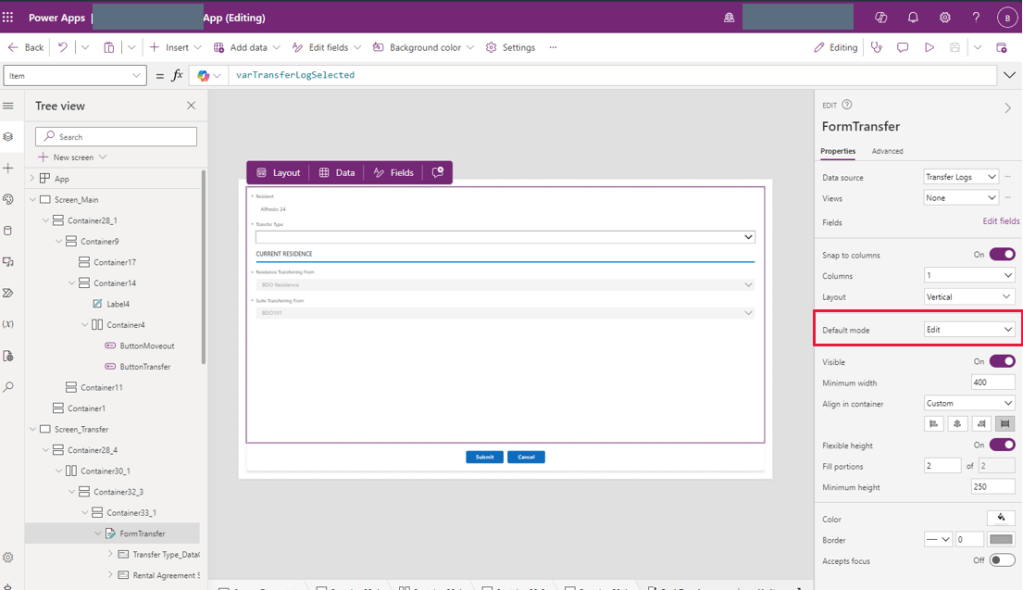
But to get to the screen where the form is in, I have an expression written from the originating screen that will set the mode of the form into New if some condition is met.
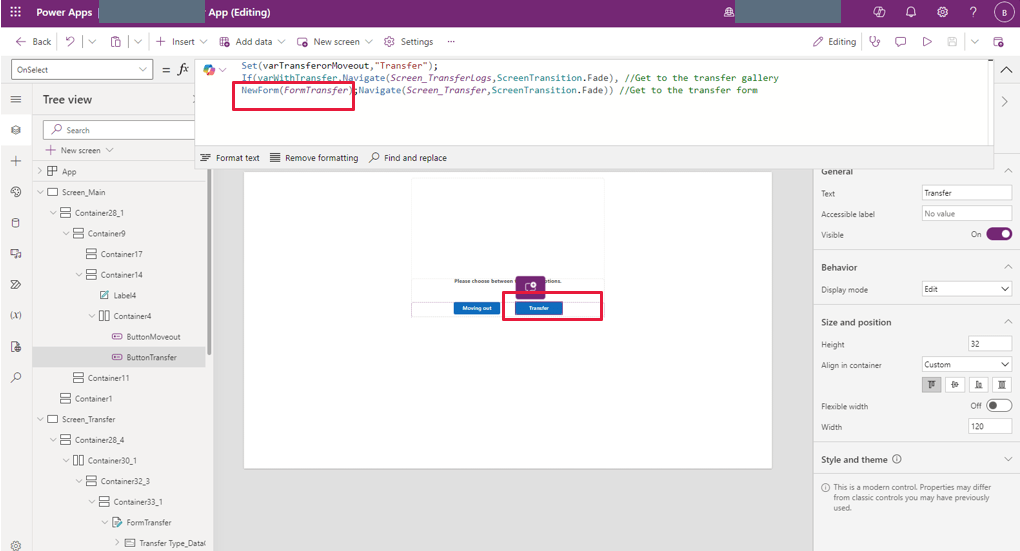
4.4 Don’t control the screen transition upon submission of the form. Instead, manage this on the OnSuccess property of the form, ensuring that the user stays on the same screen if a validation rule fails to be satisfied (e.g. mandatory field not filled in with value). If the former is done and certain validation rules errored out, the user will still be taken to that other screen. On the contrary, the second choice will keep the user on the same screen until the validation rules placed on the form are met.
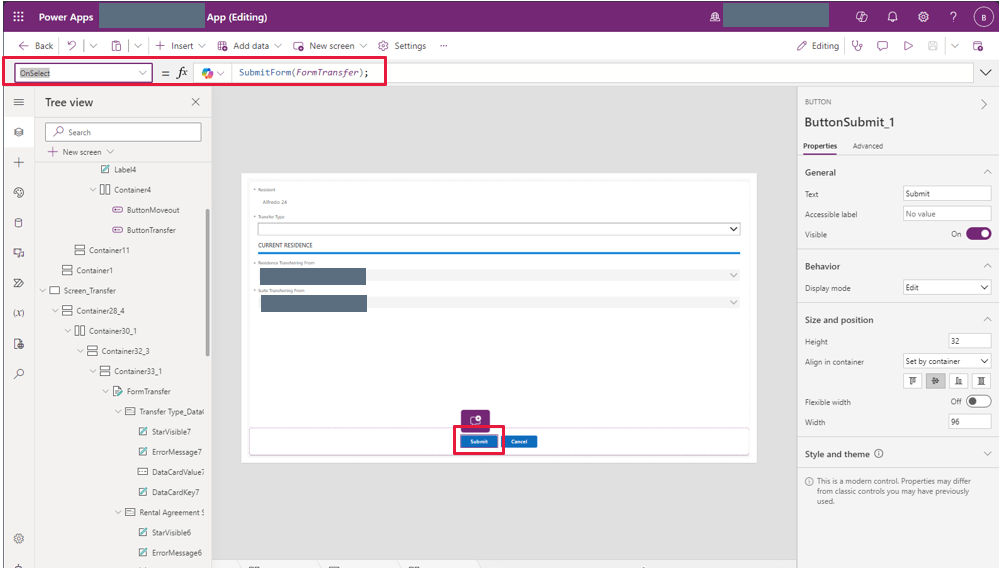
Here is the OnSelect expression of my Submit button. Notice how it’s just that, no function whatsoever on moving screens.
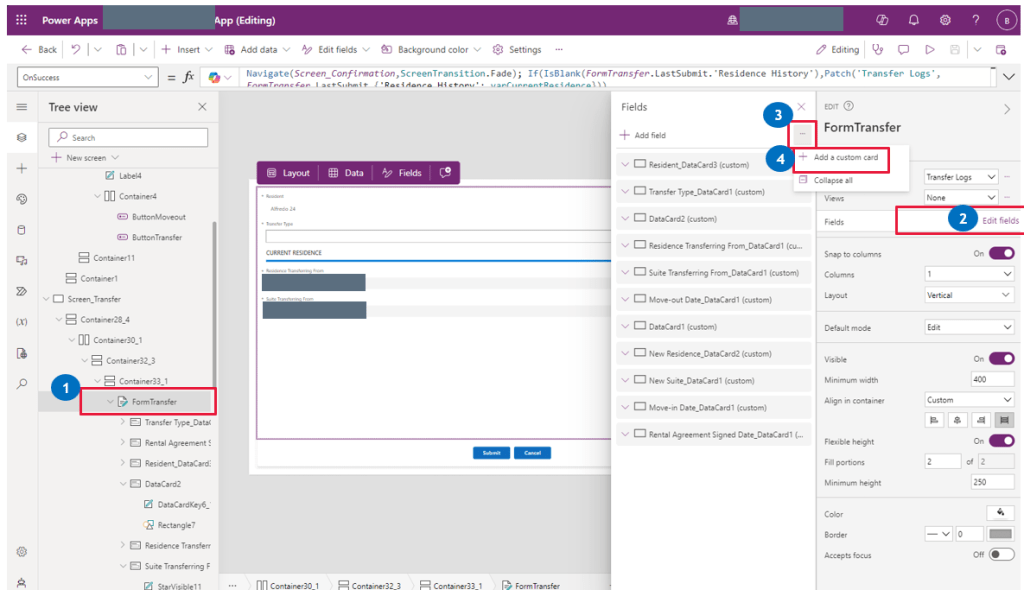
Here is the OnSuccess expression of the form.

4.5 To add extra elements to a form (e.g. labels, shapes, etc.) in order to improve its appearance, insert a custom card.
Building a page is really an exercise in exploration, so having discovered how to add lines and other things into a form which seems unhappy if anything is added to it, is a relief. 🙂
I have more things to add here for sure. But for now, those can wait until I find the inspiration to document them. 🙂
